I meant to post last year several looks for easy Easter nails but never got around to it. But Easter comes around each year so you could also look at it as well planned for this year. 🙂
Start with a couple of good matte / cream pastel shades:
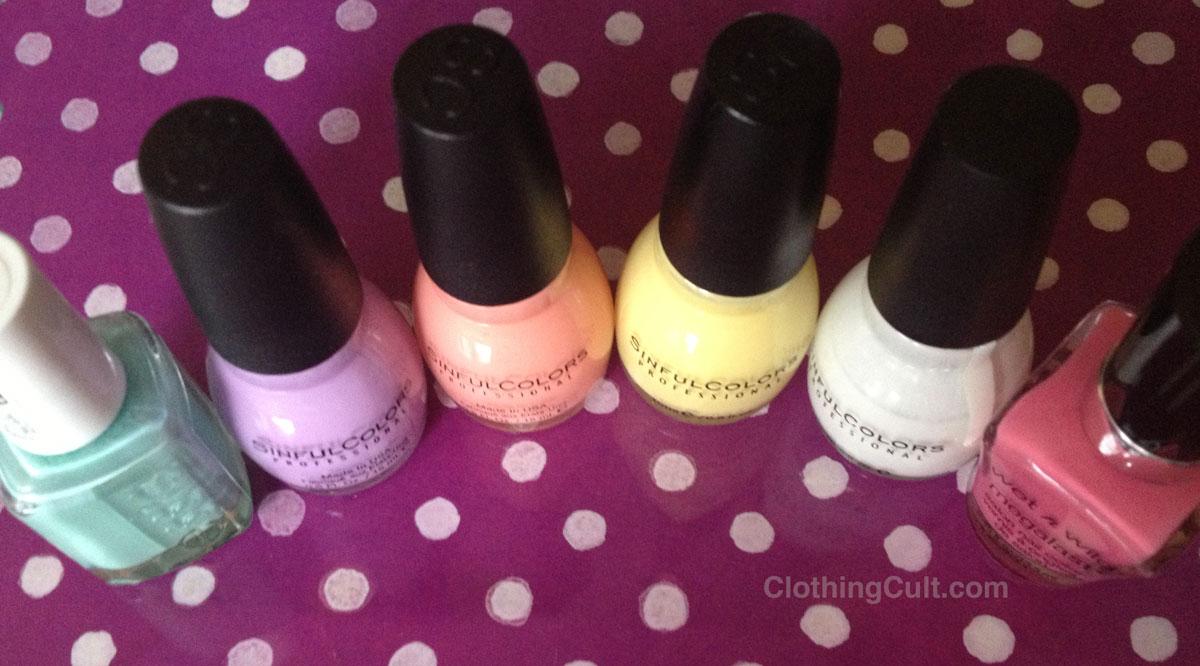
Your choice of colors can really affect whether these look Easter-y or not so I’ve put together a few options from different nail polish brands. Shown above left to right (what I used): Essie Turquoise & Caicos, Sinful Colors Sweet Tooth, Sinful Colors Orange Cream, Sinful Colors Unicorn, Sinful Colors Snow Me White, Wet N’ Wild 210C Tropicalia
Possible Pastel Color Sets:
Sinful Colors pastels set “Sugar Rush” display:
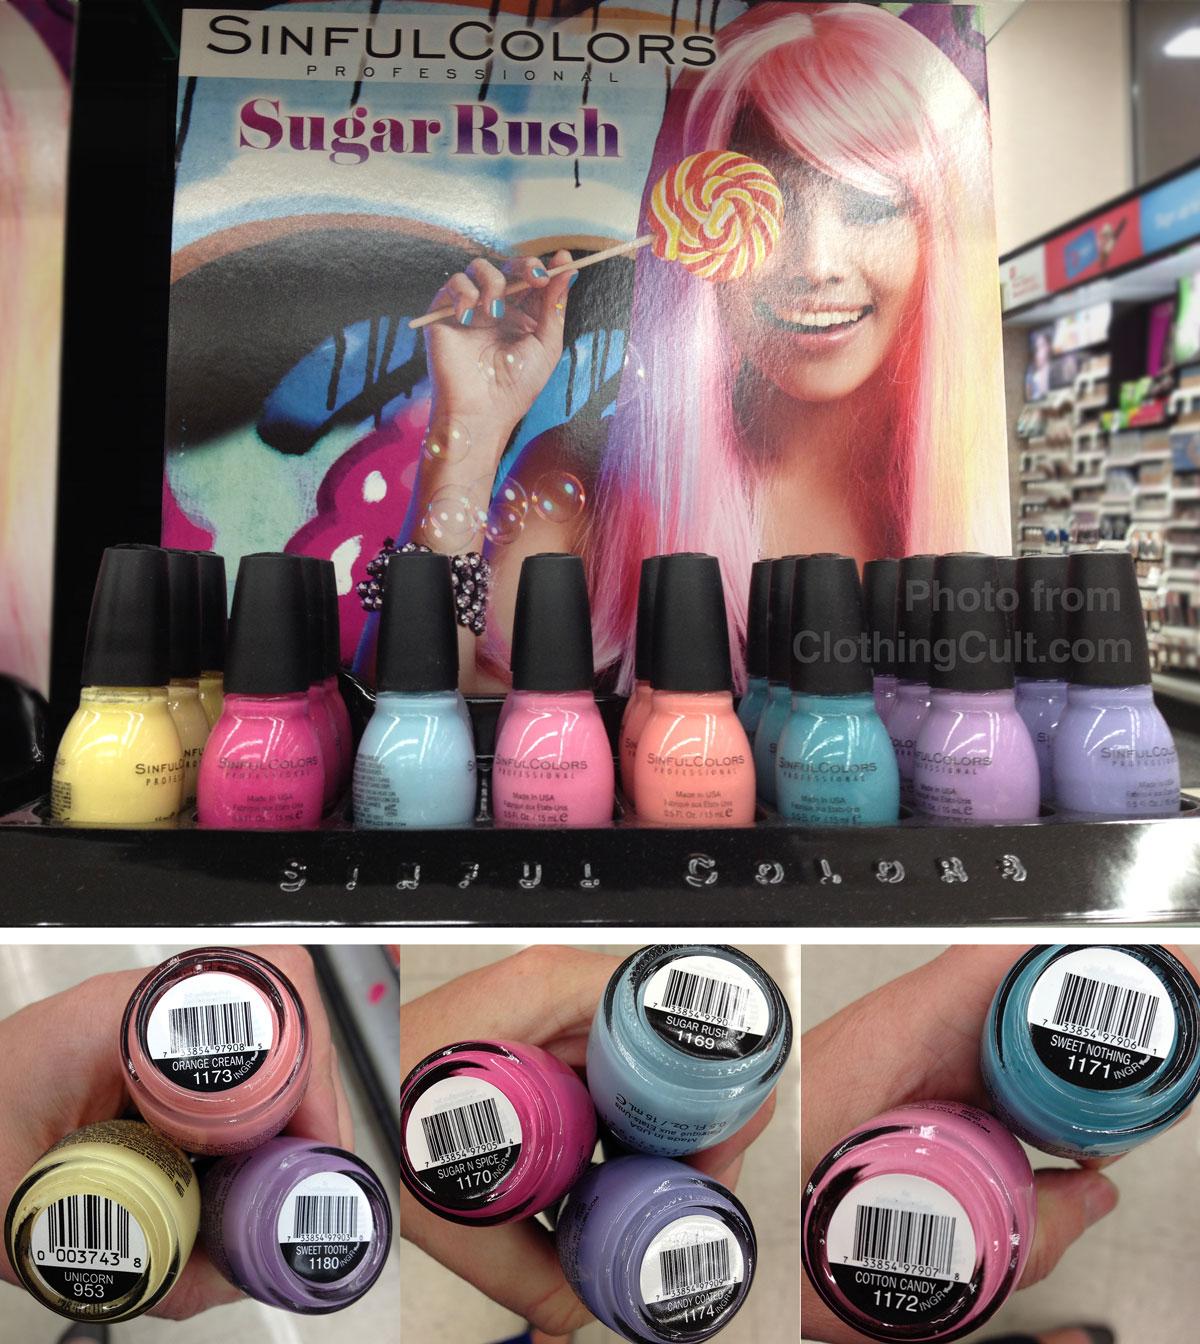
- Mint Apple (pastel green, not shown)
- Unicorn (pastel yellow)
- Orange Cream (pastel orange)
- Sweet Tooth (pastel purple)
- Sugar Rush (light turquoise)
- Cotton Candy (pastel pink)
- Sweet Nothing (pastel blue)
- Candy Coated (another pastel purple with a hint more blue)
- Sugar & Spice (another pastel pink but darker than Cotton Candy)
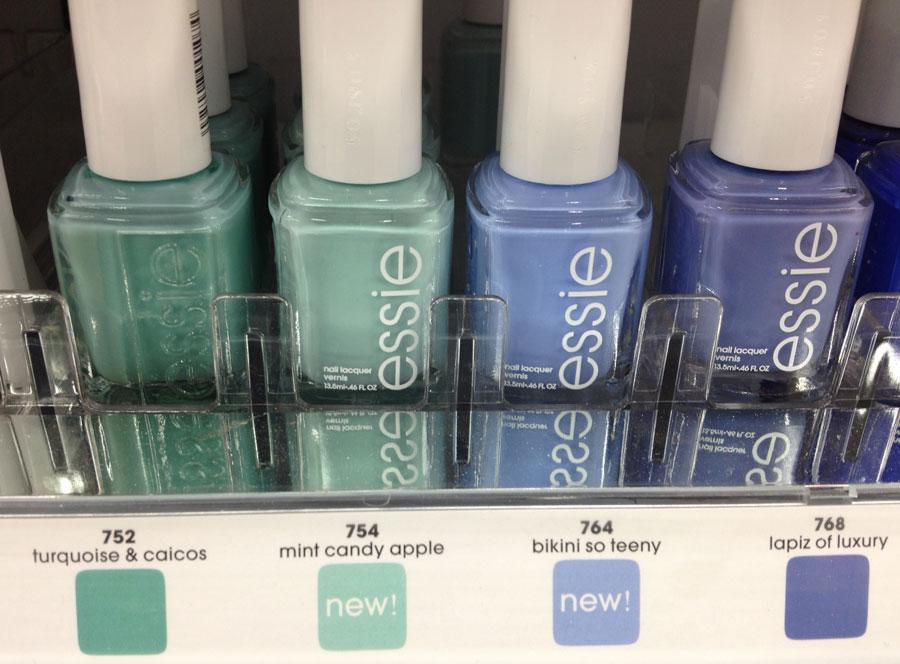
Essie pastels set:
 (I’ll try and go back and take a few more photos of possible Essie colors soon)
- Lapiz of luxury (periwinkle / blue purple)
- Neo Whimsical (lilac / pinky purple)
- Turquoise & Caicos (pastel turquoise)
- Tart Deco (pastel orange with a hint of pink)
- Check-up (though there are tons of pinks that are possible)
Wet N’ Wild pastels set:
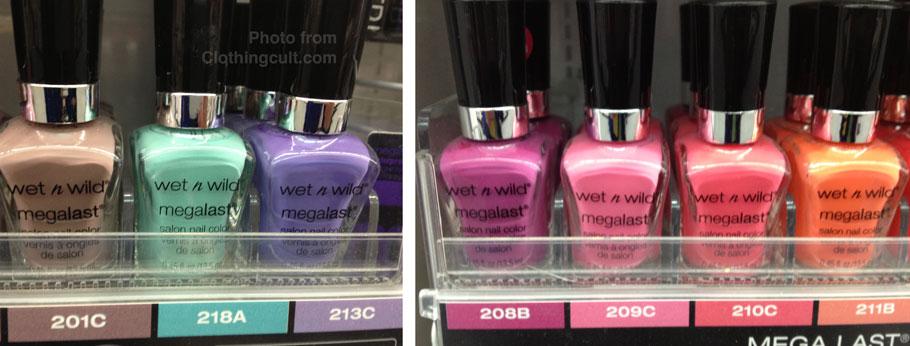
- 201C Wet Cement
- 218A I Need a Refresh-Mint
- 213C On a Trip
- 208B Through the Grapevine
- 209C Candy-licious
- 210C Tropicalia
- 211B Club Havana
Additional polishes:
- Base Coat
- Any pure white nail polish (optional – used Sinful Colors “Snow Me White”)
- Essie’s “matte about you” top coat (optional)
- Your favorite glossy top coat (if no matte coat used)
Keep in mind that if you have trouble combining colors, want a simpler look OR simply want to spend less money on polishes, choose one pastel color and white for your pattern accent.
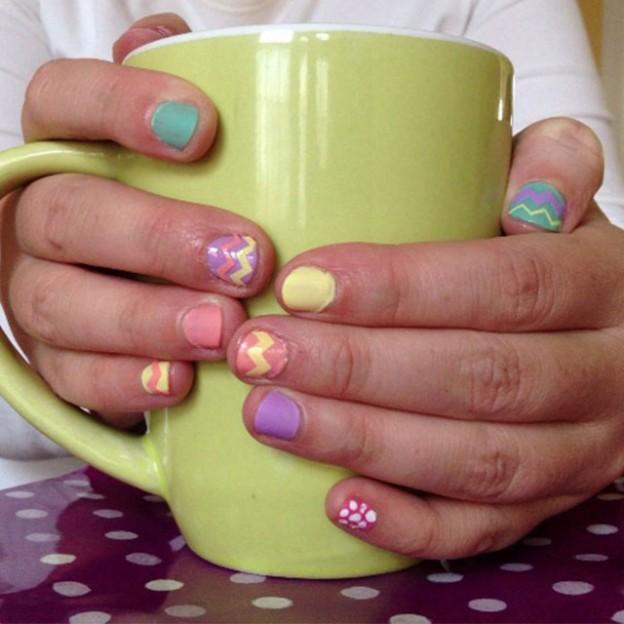
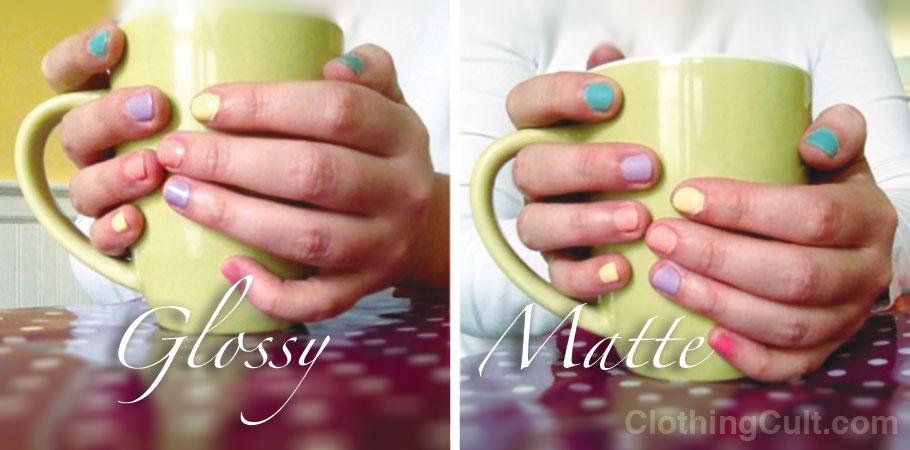
Option #1 – Your easiest option – Multi-color pastels (Least skill needed):
Just paint each nail a different pastel color. Base coat, multiple colors of nail polish, top coat, done. And if you have it available, I like matte like Essie’s “Matte About You” for the top coat. 🙂
Option #2 – Polka Dots (your second easiest option):
Additional tools needed: Something to make dots with. This can be any of the following:
- a hairpin – you’ll need to straighten it some
- toothpick – you may have to draw with this if the end is smaller than the dot you want
- straight pin (sewing) – inserted in a pencil eraser for better control and so you don’t poke yourself
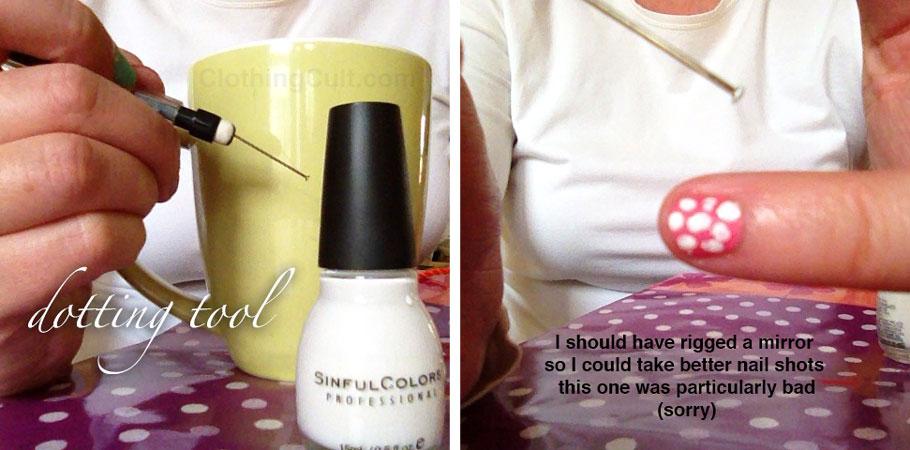
If you’re expecting perfection you either need a steady hand or maybe try out a stamping tool instead like Konad.
Option #3 – Zig Zag / Chevron (a little bit harder but still easy):
Additional tools needed:
- Scotch tape
- Zig Zag scissors / Pinking Shears (easily found at most craft or sewing stores)
- Regular scissors (small is better in my opinion)
- Glossy top coat required
![]()
I have in fact tried the method shown by Birchbox here. When I tried directly on my own nails though, I must not have pressed down on the tape enough because I had nail polish leak under it in places. The only place I had good success with this method the few times I tried it was not on my own hand (on plastic nail trays.)
But I found an even simpler method – we’re going to create our own chevron nail striping tape which is easier to get right as well as creating crisper edges. We want easy Easter nails right?
Chevron Striping Tape Steps:
- Paint your scotch tape with several coats of nail polish. Paint a little more tape than you think you will need. Paint and let dry, paint and let dry. Be sure to really let this dry before you move on to the next step. (For informational purposes – mine sat overnight on the tape dispenser because I thought I was going to do my nails yesterday but didn’t.)
. - Cut your tape with the zig zag scissors. This may take a couple of tries to get lined up the way you want so don’t worry if the first piece isn’t what you want on your nails. I used the mug in the photos to hold my tape parts temporarily.
. - Apply the chevron strips to your nails. Use as many or as few as you want (also depending on your nail size.) I didn’t use tweezers but they may help place the tape if you’re having trouble.
. - Trim the excess tape using your small regular scissors. Shown are sewing thread scissors. Cuticle scissors are also small.
. - Add a clear top coat or two to seal the tape in place and you’re done!
And there you have it, 3 options for easy Easter Nails!
Update: The chevron tape lasted about 3-4 days before the thinner chevrons started coming off. I’m not sure if it might last longer with an extra top coat or without the matte polish underneath.
![]()