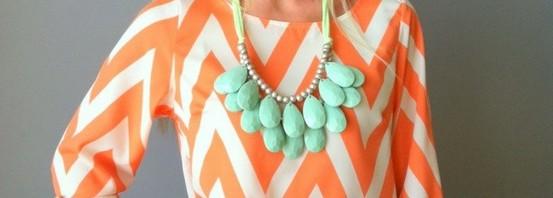
Just a selection of things I’ve pinned or repinned on pinterest recently.
🙂
Click on any image below for a larger view OR go for the links to sites, go to: http://pinterest.com/hilary_baumann/style-files/


Just a selection of things I’ve pinned or repinned on pinterest recently.
🙂
Click on any image below for a larger view OR go for the links to sites, go to: http://pinterest.com/hilary_baumann/style-files/

What do you think? Good combo? Overkill on the arm candy? 🙂

Inspired by the Forever21 scarf I bought (as seen in my May Birchbox unboxing video and below), I decided to make a few more.
I will note that it is actually cheaper to just buy a scarf from Forever21 because you will need 2 yards for the length scarf I made. You however get a larger choice in fabrics by learning to make your own.
Here are the two scarves I made:
Try and ignore the purple shirt under the sarong. I didn’t want to change to demonstrate some possible tying options. 🙂
Sewing a rolled hem:
I found this video useful to correct some of the mistakes I was making on my first attempt at sewing a rolled hem on light fabric. I’ve actually done a rolled hem on cotton before and the machine foot did a lot of the work but with the lighter fabrics you have to pay attention to the details more.
Scarf tying (European Loop is my favorite, then fake knot and braid):
Sarong / pareo tying:
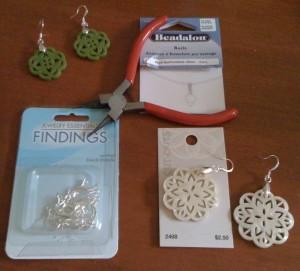
I went to Hancock fabrics this evening and came across these buttons that I thought would make perfect earrings. They’re very simple and cheap to make.
 Supplies:
Project cost should be around $12 or less
unless you don’t have pliers or wire cutters.
I got both the large white buttons and a green that’s unusual.
This project is super simple.
The white earrings button size is 1 1/2 inches (38mm) so they are slightly longer than that.
Made from laser cut polyester. They feel a bit like plastic but with a pearly finish and they are VERY lightweight.
So I found this great Ralph Lauren bracelet on clearance at Dillard’s. I didn’t like it as a bracelet as much as I wanted it for the giant clasp. I’ve been looking for a giant clasp since Switzerland and I haven’t seen a good one for less than $20+S&H so I jumped at the chance to buy one for about $18 with turquoise beads I knew were at least worth $7 or more. Since this wasn’t my initial purpose for the large clasp I went back and bought a pink bracelet as well.
4 Simple steps:
And voila, you have a new necklace!
Matches the earrings and ring I previously posted. Yay – a full set!
Recently I bought a wrap sweater from Victoria’s Secret. I love the options and ways it can be worn but the fabric has been horrendous. I got the Cotton & Cashmere Shadow Stripe Wrap which they no longer carry. Basically a little of:
I have gotten a few good wears out of the sweater but it pills, heavily. But it’s black so it’s less noticeable. I would have returned it if I had spent the original $60 price. However it was discounted and then I had a $10 off coupon so I only spent about $16 for the sweater and a scarf including shipping. Not worth the wasted time (and an awesome deal really.)
What I’ve learned however is that that sweater is basically a giant rectangle plus sleeves. Which got me thinking, why not make my own quick drape-y sweater vest? I had some men’s undershirts that I thought would be perfect fabric (there’s not much knit fabric to choose from locally for some reason) and it was at least a good test run.
Why I think it failed:
I should have simply measured the VS wrap to start with (which is by the way about 31″x87″.)
I will be trying this again soon. The men’s undershirts were I think about $10-$12 for a 4pack (Hanes Men’s Sleeveless 4 Pack Rib Knit or Fruit of the Loom Men’s 4-Pack A-Shirts. 2XL gets you a fair amount of fabric to play with.) If I can find some knit fabric locally it would be faster and no-sew so I’ll be checking that out.
Or I might buy some from fabric.com. I haven’t bought fabric off the internet yet and missing that step of touching it before buying will be odd. Maybe one of these though.