Tag

sew

August 4, 2013

Alter a bikini so it doesn’t dig into my neck –
convert it to a criss-cross style

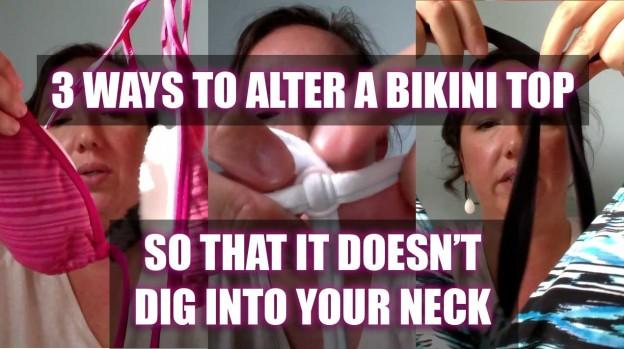
So I mentioned in my last post about swimsuits that I had a couple of ways to alter bikini tops so they don’t dig into my neck. One is no-sew and the other two require sewing and I’ll outline each of these, two of which are criss-cross or cross-back styles, with diagrams below. I’ve also done a quick video in case that helps you get a visual on how things came together on real bikini tops.

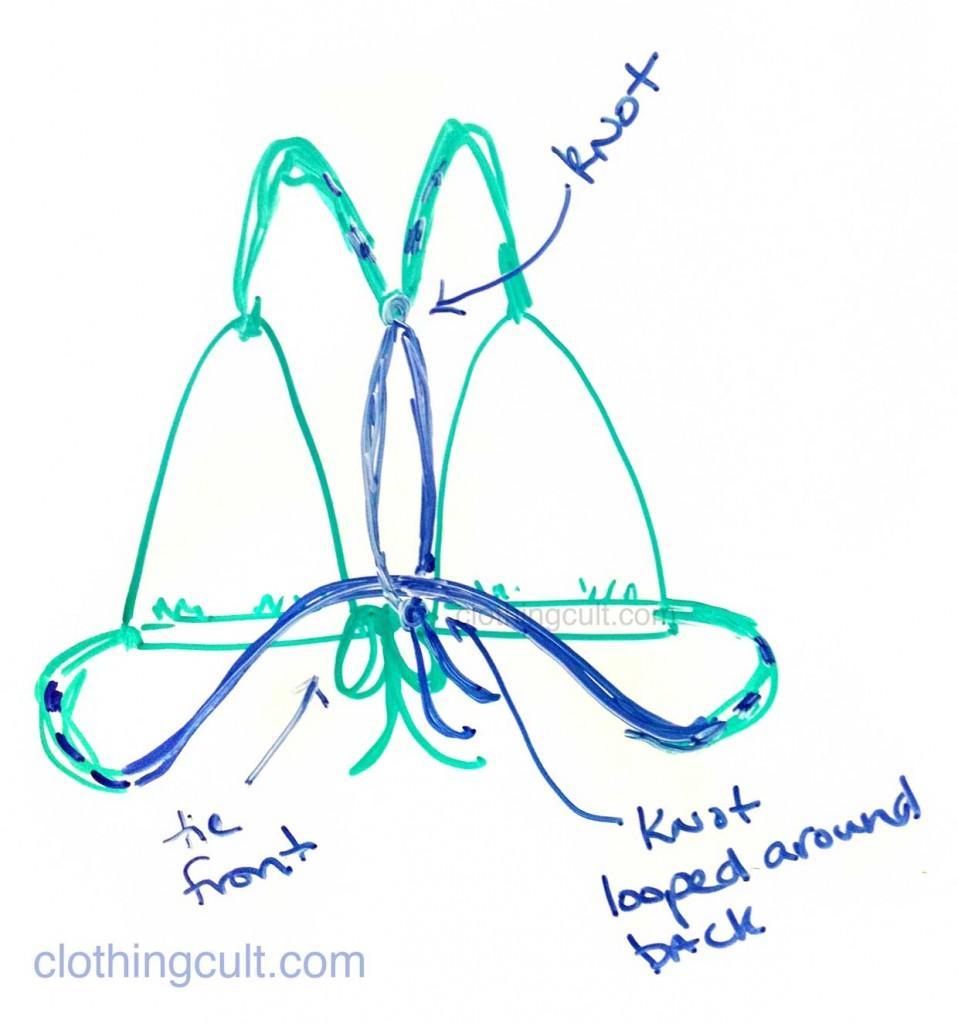
No-sew alteration of a triangle bikini top:


No-sew-alteration-of-a-triangle-bikini-top

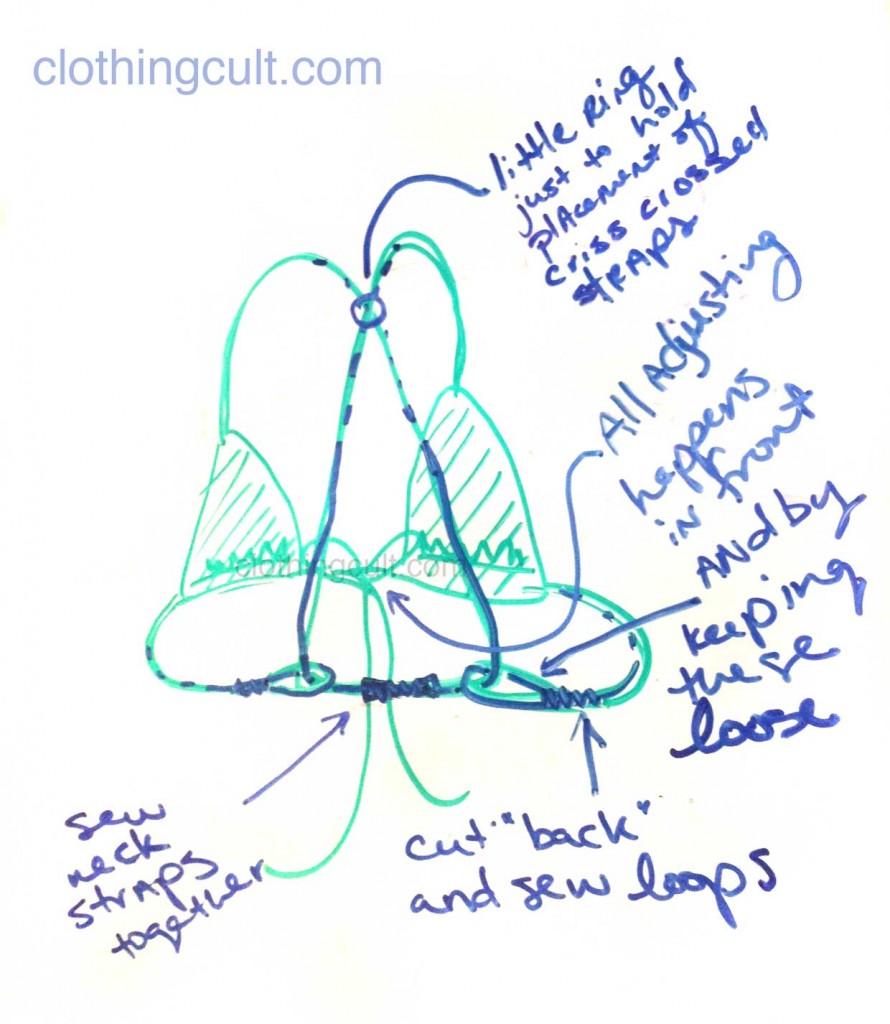
Alter a triangle bikini top to a criss-cross back style:

Alter-a-triangle-bikini-top2

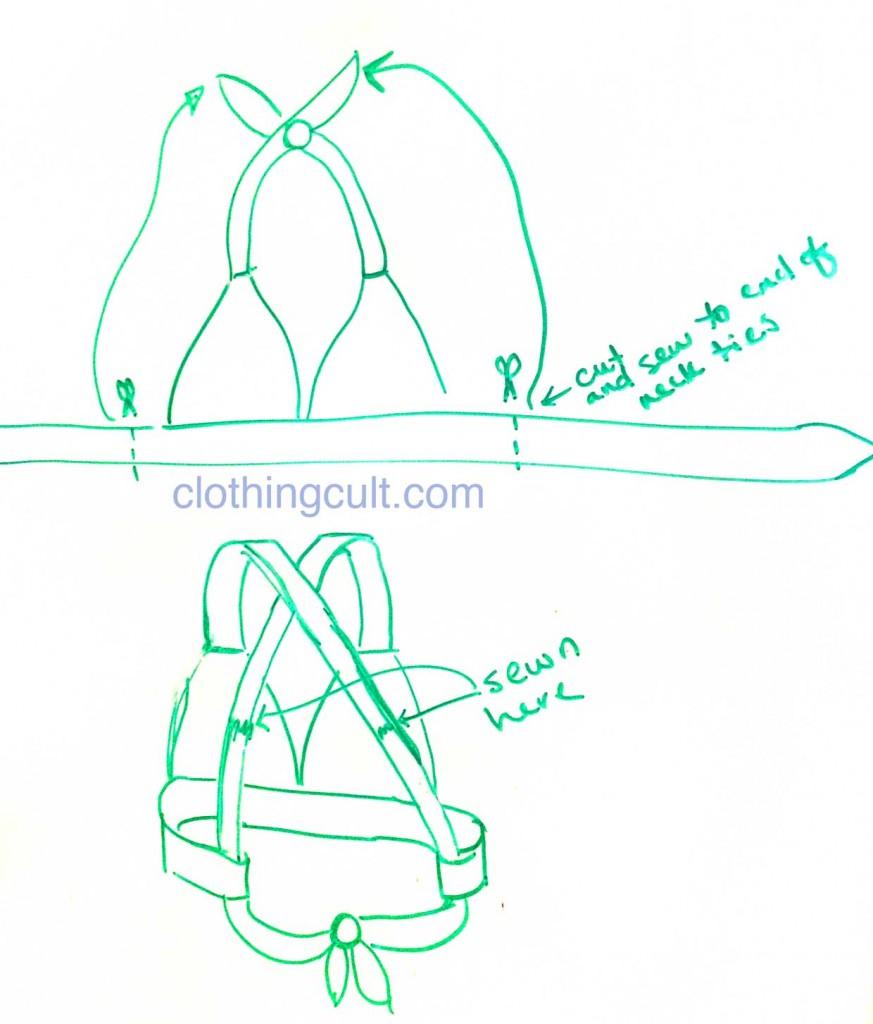
Alter a halter bikini top to a cross back style (my favorite):

Alter-a-halter-bikini-top2


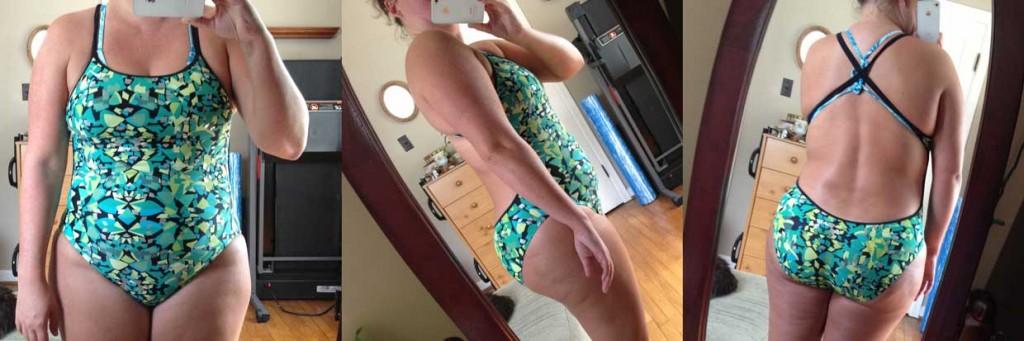
Layered bikini top with one-piece swimsuit:

And this is how a bikini top looks under a nike spiderback swimsuit. Yes that’s me. For full disclosure (and maybe to help other people’s perceived weight and body issues) I’m about 5’4″ and 175lbs in these photos. And yes, I don’t look like a “long torso” but when it comes to shopping for swimsuits for some reason I am. These nike suits are one of the few I’ve found that fit as a “regular” and I don’t think they make a tall in these.

Pictured is the no-sew option on the bikini top. I caught the dangling ties in the one-pieces straps which is why you don’t see those hanging down.

Some of the athletic style one-piece suits don’t even have a shelf bra in them so yes, I’ll wear a bikini top underneath for some added support even though I’ve had a few people ask me why. 🙂

layered-bikini-top-with-swimsuit

May 14, 2012

Make something Monday:
spring / summer scarf

Inspired by the Forever21 scarf I bought (as seen in my May Birchbox unboxing video and below), I decided to make a few more.

Forever21 scarf

I will note that it is actually cheaper to just buy a scarf from Forever21 because you will need 2 yards for the length scarf I made. You however get a larger choice in fabrics by learning to make your own.

Here are the two scarves I made:


Try and ignore the purple shirt under the sarong. I didn’t want to change to demonstrate some possible tying options. 🙂

Supplies needed:

  • Sewing machine. I’ll try and do a few no sew projects in the future but this you probably need a sewing machine for.
  • 2 yards fabric. Something that’s thin and drapey. Chiffon, silk, even a light polyester. This is where going into the store and feeling fabrics is actually a good idea. This will be against your skin so if you don’t like how it feels, don’t buy it because you’ll be less likely to wear it if you don’t like how it feels. You’ll be using the full length for the scarf but you will only need a 16-17 inch strip for the size scarf I made. Both of the fabrics I chose were $4.95/yard. You can use the remainder for a sarong like I did above or to make scarves for your friends.
  • Thread to match. Around $3 each. Don’t forget an empty bobbin if you don’t have one at home.
  • Rolled hem sewing machine foot. Between $9 and $30 depending on your machine. Again, I already had this at home. I can’t imagine doing this project with a regular foot however you might be able to do a single tiny fold with zig zag stitch depending on your fabric but it’s not going to give you quite the same clean finish.
A couple of quick photos mid-process:


Videos I referenced:

Sewing a rolled hem:

I found this video useful to correct some of the mistakes I was making on my first attempt at sewing a rolled hem on light fabric. I’ve actually done a rolled hem on cotton before and the machine foot did a lot of the work but with the lighter fabrics you have to pay attention to the details more.


Scarf tying (European Loop is my favorite, then fake knot and braid):


Sarong / pareo tying:

Pareo and Sarong Tying for Womenhttp://pareo.com 20 Ways How Women can Wear a Pareo or Sarong from pareo.com.

August 16, 2008

DIY T-shirt refashion: Hard Rock Cafe Maui

Ok, so this was freehanded and I had no pattern. I cut it apart, sewed some things together tried it on, sewed some more, tried it on again, sewed some more until I was done.

I tried to outline a little of what I did but even after I drew it up I kept remembering little things I did like ties on the shoulder straps because they were a bit wide. Also note that for the front top I did a lettuce stitch and then use some thin elastic to make it gather and fit better.

Hard Rock Cafe - DIY shirt refashion

A few posts back I linked to some resources for sewing and DIY fashion. There are a lot of tips and tricks that may help you refashion an old or large t-shirt. 🙂

July 12, 2007

DIY project: Lace inserts in shirts

Ok I really like this idea, to cut out a section of camisole and then add in some lace or other decorative trim (crochet might work.)
white tank with lace inset

This shirt is really cute but I don’t think I could spend $70 for a wife beater when I could buy some for $5 and add to them myself (I don’t think the smushed boob look here isn’t a good one either but I think that’s the result of a bad choice in tube bra.) If you think these shirts are worth $70 or you simply have no time or any sewing skills whatsoever, here’s the link: http://www.graeyny.com/whitelacetank.html

Otherwise I think it would be a really great, easy and cheap DIY project. I’ll let you know if I end up making some. 🙂

PS – note the new addition to the comments on the site. It’s called recaptcha and it’s really useful, really easy to install and it has basically gotten rid of spam comments for me. Oh, and I will be killing the promo section of this site in the near future … I haven’t been able to keep it up to date plus it didn’t help to get hateful comments by some people (chewing me because a code that was over a year old didn’t work … let’s see… not my fault a code over a year old doesn’t work so there was no need to take it out on me. I basically haven’t bothered TRYING to do the coupons and promos since then.)